SUPER 8 FILM TIPS
Choose the right film for your shooting conditions.
Super 8 Film Tips
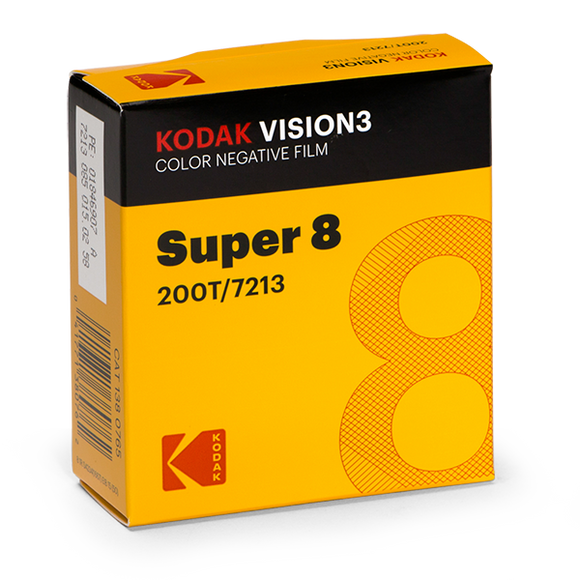
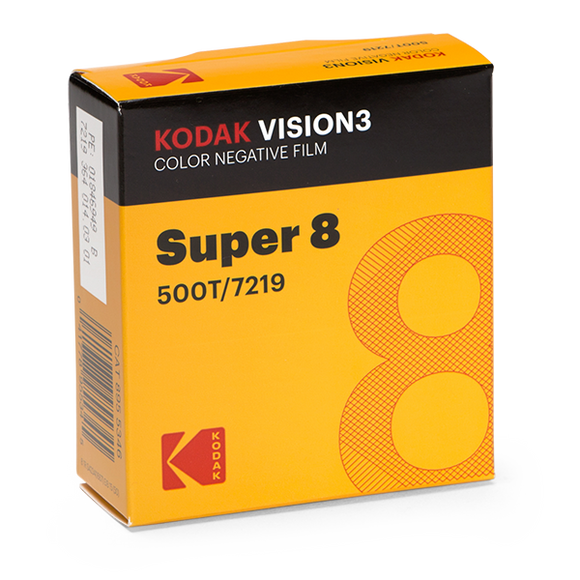
Which film is right for you?
Kodak 500, Kodak 200D, T=Kodak 50D, Tri-X B&W
General Tips from Kodak:
Hold the camera steady. Use a tripod whenever possible. One of the largest factors contributing to professional-quality pictures is steadiness.Remember that Super 8, with its small frame is a "close-up" medium. There is a limit to the amount of detail that the Super 8 frame can capture when compared to larger film formats, and the comparatively small screen poses some limitations, too. Often the most effective images are those shot at medium and close-range. Be sure that your camera's batteries are fresh to ensure proper operation of the motor and built-in meter. If your camera has a "zoom" lens, use it sparingly. When shooting interiors with limited light and high-speed film, consider the use of a small "fill light", even if your camera's meter indicated that you have sufficient light for an exposure. This will add depth and detail to your pictures.
Process your film promptly after exposure. Most Super 8 film requires processing by independent laboratories. Contact your local photo dealer or your Kodak representative for a list of laboratories in your area.
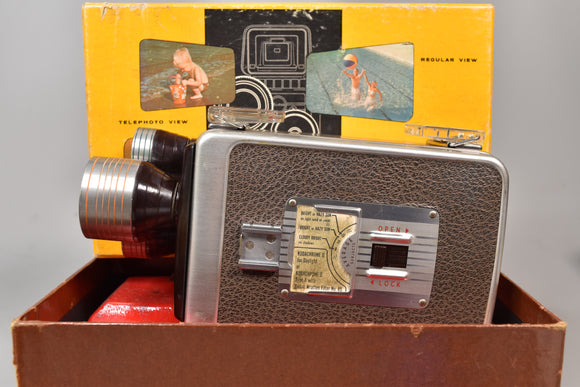
How To Insert The Cartridge
The Super 8 film cartridge fits into a movie camera only one way. However, the manner of loading depends on the camera. In all Kodak movie cameras, you insert the film cartridge so that the notches face toward the front of the camera and so that the cartridge label will be visible through the window on the side of the camera. If you have a side-loading camera, such as the one illustrated below, insert the cartridge at the angle shown. Then press the back of the cartridge down until it is securely seated. Never force a cartridge into a camera. In the other camera illustrated, you just slip the cartridge into the back of the camera. Be sure to read your camera instruction manual for specific loading instructions.
COMMON PROBLEMS
If film is black--absolutely no pictures:
- lens cover not removed
- malfunction of the camera's lens opening or metering system
If film is very dark--with only faint indications of pictures:
- insufficient light
- a malfunction of the camera lens opening or metering mechanism
- a weak or dead meter battery
- something unusual in processing or manufacturing
If film is almost clear--with only faint indications of pictures:
- a malfunction of the camera lens opening or metering mechanism
If the film is clear - no pictures whatsoever:
- something unusual in processing
If film has pictures - but no sound:
- a weak or dead sound battery
- a microphone-related difficulty--not plugged in, a loose plug, a broken wire in the cord, or a defective microphone
- a camera problem
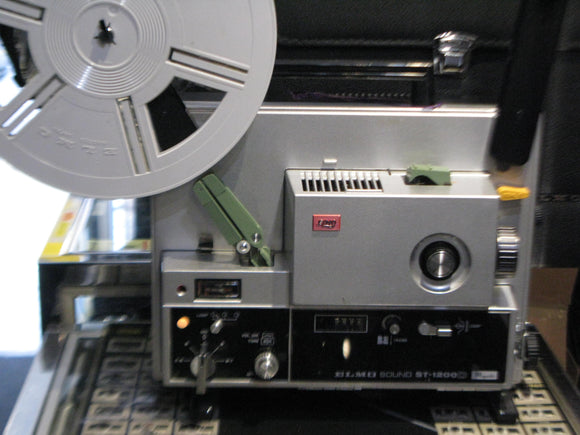
If the film appears to "jump" or "chatter":
It is the lack of sufficient lubrication on the film that often causes unsteady projection. If the film is not lubricated, some projectors can damage the film perforations. (Kodak film is automatically lubricated during processing by Kodak.) Once the perforations are damaged, lubrication will not solve the problem of unsteadiness. Such damaged areas must then be either spliced out or duplicated. Lubrication also helps prevent drying and warping of film. For protection and long life, film should periodically be cleaned and lubricated.
MAKING A MOVIE
The wonderful thing that distinguishes snapshots from movies is MOTION. Sometimes people forget this when they are making movies. There are some suggestions to help you make the most of your movie-making.
CONTINUITY
As you make movies, keep in mind that you are really telling a story. Like any story, your movie needs a proper introduction, a body, and a conclusion - plus, continuity to tie all the parts together. Continuity may come naturally when you film the action as it happens in it normal progression, or it can be created when you edit the film into logical order later. Before shooting any movie story, it's good to write a plan. Think of what you want to film to help complete your movie story.
Telling stories with your movies is quite easy. You start your movie with a natural introduction, follow the action as it happens, perhaps with a few scenes specially acted out for the sake of your story, and shoot a scene or two for the conclusion.
Starting and concluding your movies need not be a major production. You can use titles or photograph scenes that symbolize your beginning and conclusion. A handy conclusion of a picnic story would be a scene of junior fast asleep in the car after a rigorous workout.
In a picnic movie, storytelling continuity could be achieved by a short title shot of the park sign between the car-loading introduction and the arrival at the picnic area, where mom spreads the tablecloth on the table.
You can apply the movie-story format to all your personal movies, whether they are of a family picnic, a vacation trip, or any other event. Usually, you can make a good movie by confining you filming to normal proceedings and doing an occasional bit of directing of your own to keep the story moving along.
VARIETY
A few simple techniques can help you add a lot of interest and variety to your movies:
Scene Length
The nature of your subject should determine scene lengths. Because you film different subjects doing different things, varying the scene length almost comes naturally. You might film a long scene for about 10 to 13 seconds - occasionally up to 15 seconds if you're panning across a scene, or if you think the scene requires it. A medium scene may last 8 to 10 seconds; a short scene, no longer than 5.
Suppose you're filming a group of Boy Scouts building a campfire. You would probably start with a long scene to establish what's going on and to record the parade of stick bearers. When you've adequately covered this, you might film a medium-length scene of one of the Scouts arranging the fuel in regulation campfire style. Finally, you could film a short scene of a Scout's hand applying a flaming match to the kindling. Because of the simplicity of this action, a 5-second or shorter scene is probably all you'd need to get the message across.
Scene length is also a handy device for emphasizing the type of action you're filming. To accentuate fast action, include many short scenes about 2 or 3 seconds long. For lazy, slow, plodding subjects, you might take one or two scenes about 12 seconds long.
Most of your scenes will probably run from 5 to 13 seconds. Too many short, 5-second scenes may leave your audience exhausted, or a succession of scenes running longer than 13 seconds may induce slumber. Strive for variety in scene length, with short scenes following long scenes, and with each scene lasting just long enough to contribute its special piece of action.
A 50-foot roll of super 8 or 8mm movie film is long enough for an average of 20 to 24 scenes. Sometimes you may get fewer or more scenes, depending on your subject material. When you consider that each of the 20 to 24 scenes is a "moving snapshot," you really capture quite a bit on one roll of film.
CAMERA-TO-SUBJECT DISTANCE
When talking about subject distance, it's important to also talk about subject size. When your subjects are people, a close-up is a scene taken from 6 feet or closer and intended for a head-and-shoulders shot. However, a close-up shot of something much larger, such as the Statue of Liberty, would be filmed from a distance much greater than 6 feet. For most of your home movies, anything filmed at a distance of 6 to 25 feet is a medium shot, with your camera covering a height of about 6 feet. A long shot would be any scene filmed from beyond 25 feet.
The important thing to remember is to intermix long, medium, and close-up shots for variety. A good rule of thumb for your filming is to start a movie sequence with a shot to establish the action. The most common establishing shot is a long-distance shot to show the whole setting, but it could also be a close-up to show one aspect of the action. Then follow with a related scene shot from a different distance. Keep in mind that close-ups add variety, impact, and interest. So, use them often when they're appropriate.
To know when to vary your filming distances, it's necessary only to apply imagination and common sense. By including only those parts of the scene you actually need, you'll automatically change your shooting distances as your needs change.
For instance, consider how you might take a movie of Dad's afternoon fishing trip. First you'd probably establish the setting with a long-distance shot of Dad and the family dog walking up to a choice fishing spot. The long-distance shot includes just enough of the surroundings to identify the locale. Then you might film a medium-distance shot of Dad setting down his fishing tackle and his rod and reel. Follow this scene with a close-up of his hands baiting the fishhook. A close-up like this shows only the essential elements for that scene. Continue with a medium-distance shot of Dad throwing out his line, a long-distance shot of the dog and him waiting for a bite, a close-up of the dog falling asleep, and so on, until the close-up of the catch at the end of the day.
CUTAWAYS
In a cutaway, you simply leave the main action for a brief scene to film something else that's related to your movie. In the preceding example, we mentioned a close-up of the dog falling asleep. This is a good cutaway. The camera left the fishing itself and concentrated on the sleeping dog as Dad waited for a bite. Cutaways like this, or of excited crowd reaction and other sidelights at a sporting event, add interest and variety to the main action.
SEQUENCES
To enrich the continuity of your movie story, make sequences of related action. In a movie sequence you film a series of scenes of the action instead of just one scene. The moviemaker can film various aspects of the action from several different camera angles and filming distances to help tell part of the movie story in an interesting way.
CAMERA ANGLE
For even more variety in your movie story, shoot from different camera angles. You might shoot head-on for a medium shot, and then move in for a close-up, but at a new angle. Whenever you change filming distance, you should also consider changing the camera angle.
If you're making movies of activities within a relatively small area, it's often a good idea to change your viewpoint to accommodate the changing scene. Shoot from either side of your subject, or change from one side to the other if it gives you the best angle to show what is important to the story. However, when making a movie across an extended area, best results are usually obtained if you don't vary your viewpoint form one side of your subject to the other. For instance, if you're making a movie of a hike in the woods, it's a good idea to show your subjects always traveling in the same direction. This makes the sequence flow in a logical manner. After your subjects have reached their destination and you've filmed on-the-spot activities, such as a picnic, you can show your subjects heading in the opposite direction and returning to their starting point. Constantly changing the viewpoint and direction of travel can make your movie look fragmented and may confuse your audience.
COMPOSITION
Composing your scenes carefully in the viewfinder enhances the quality of your movies. You're already far ahead of the game if you can (1) keep the background uncluttered, (2) concentrate the camera on one center of interest at a time, and (3) keep the horizon straight.
An uncluttered background helps focus attention on the subject. By filming from a low angle and using the sky as a background, or by shooting from a high angle toward the ground or water, you keep a lot of distracting elements out of your backgrounds. This is especially effective with close-ups of people.
When using the sky as a background, make sure the subject is frontlighted or sidelighted if you're using a camera with automatic exposure control. Don't use the sky as a background on overcast days because it will turn out dull and gray in your movies. Before you start filming, if necessary, try shifting your camera position or the subject to get a better background. Although it's possible to eliminate a lot of unwanted background distractions, you can't do so every time - your camera must follow the action even if it sometimes moves into an area where the background is a bit cluttered.
Hold your audience's attention by having one center of interest for each scene. This not only improves most scenes photographically, but keeps the message of each scene simple. If you have got three or four things competing for the viewer's attention in one scene, it will be confusing and will lack interest. Zero in on that part of the action that tells the story; exclude the rest.
Keep your movies on the level by making sure that level horizons stay that way in your viewfinder. A tilted horizon or leaning subjects (except for the Leaning Tower of Pisa) will be distracting.
MOVIES BY EXISTING LIGHT
The easiest and most natural way to make movies is by existing light, using only the lighting that exists at the scene. Technically, bright sunlight outdoors is existing light. But, for our purposes here, we are speaking of existing light that is not as bright as that found under most outdoor daylight conditions. This includes the light from table and floor lamps, lighting fixtures, fluorescent lamps, floodlights, spotlights, neon signs, candles, and fireplaces--even daylight from windows or skylights--in other words, any type of lighting that you're likely to encounter in homes, schools, churches, museums, restaurants, auditoriums, and outdoors at twilight or after dark.
EXISTING-LIGHT MOVIES INDOORS
In order to film subjects in the greatest possible variety of existing-light situations, you need a high-speed film and a camera that takes full advantage of dim existing lighting.
Under most circumstances, medium-speed Type A films are best for making indoor movies with movie lights or other supplementary light sources. Films such as KODACHROME 40 Movie Film (Type A) and KODAK EKTACHROME 40 Movie Film (Type A) fall into this category.
Maintaining Your Still and Movie Camera Projector
Whether your camera is still or movie, one of its greatest enemies is dirt--dirt that can give your pictures a hazy appearance, jam your shutter, or spot your film.
CAMERA LENSES
Dirty windows cloud your view of the outside. The same is true of camera lenses. Dirt or fingerprints on your lens cause hazy pictures. If your camera has a lens cap, put it over the lens to protect against dirt and scratches, or use a field case. It's a good idea to clean your lens according to the instructions in your camera manual. First, carefully blow away any grit or dust, or brush it away with a camel's-hair brush. Then breathe on the surface of the lens and wipe it gently with a soft, clean lintless cloth. You can wad the tissue into a small tuft so it will be softer--keeps fingers away from the lens. Be sure to use solvents specially designed for cleaning camera lenses. Don't use chemically treated tissue intended for eyeglasses. They may damage the lens. Do not apply the lens cleaner directly to a lens, since it may seep between the lens elements. First apply a drop or to of lens cleaner to a sheet of lens cleaning tissue and use the moistened tissue to gently clean the lens. Clean both the front and back of the lens (if the back of the lens is accessible through the inside of the camera). On cameras with interchangeable lenses, remove the lens to clean both sides. Don't try to take apart the lens itself.
It's a good idea to clean the lens after all the other parts of the camera have been cleaned. This prevents dust from settling on the lens while you are cleaning the rest of the camera. Or, if your camera has a lens cap, put it on the lens when you clean the camera. Of course any lens cover should be closed or lens cap installed whenever the camera is not being used.
You can use the above methods to clean your filters and view finder lenses, too. When dirty, these also transmit poor images.
CAMERA BODY
Dust and dirt inside your camera can cause spots on your pictures and can jam the shutter apparatus, as well. Use a rubber syringe to blow dirt from the inside of the camera, or clean it with a soft brush. Fragments of perforated film occasionally break off and fall between the lens and the film, sometimes ruining those priceless pictures. Always inspect your camera before inserting a new roll of film. Be sure to clean in and around the film-spool cavities and sprockets.
There is less chance of dust and dirt on the outside of the camera body affecting the internal mechanisms, but it is a good idea to clean there also. Fine dust can work itself into the camera from the outside.
Sand in the camera can jam its works. Protect your camera from sand and dirt, especially at the beach.
MOVIE - CAMERA GATE AND APERTURE
The gate and aperture are very important parts of your movie camera. Dust, and sometimes film particles, can gather in these areas. These can scratch the emulsion of the film as it is pulled through, or block part of the image if they are allowed to accumulate in the aperture. These scratches and accumulations show up when you project your movie.
Your camera instructions manual should explain the correct method of cleaning the gate and aperture. If the gate is accessible, you can clean it with a slightly moist cloth and polish it dry with a soft, lintless cloth. If it isn't accessible, have it cleaned by a competent camera repair technician. Don't scrape any part of the gate with a metallic object.
A soft brush or soft, lintless cloth can be used to clean loose dust and dirt from the gate and aperture either before cleaning the lens or with the lens pointed up so that dirt doesn't fall onto the back of the lens.
If cleaning doesn't stop the collection of dirt at the gate or aperture, the camera should be checked by either the manufacturer or a camera repair technician.
BATTERIES AND ELECTRICAL CONTACTS
Many cameras need batteries - for built-in flash, exposure meters, or electric motors. So it's quite important that you test our batteries and clean the battery and camera contacts periodically.
If the contacts in your equipment are difficult to reach with a cloth, clean them with a water-dampened cotton swab. Some batteries have a battery compartment with contacts on the underside of a sliding door or on the sides of the compartment. There's no easy way to reach these contacts, but you can clean them by opening and closing the battery-compartment door several times with the batteries in place. The friction is enough to clean the contacts. Never use anything rough, like sandpaper, emery cloth, or a nail file, to clean the contacts. These will remove the plating on modern electrical contacts.
If your camera will be idle for some time, remove the batteries to prevent corrosion damage. Storing batteries in a freezer will extend battery life. Be sure to wrap them in plastic to protect against moisture.
Sometimes the spring tension of the contacts might be too weak to provide good battery contact. If so, adjust the tension by bending the contacts slightly with a nail file or small screwdriver so that the batteries are held firmly in place. Recessed contacts can be lifted with a hook made from a paper clip.
STORAGE
When the camera is not in use for some time, remove the batteries and store them in a carrying case or in a corrugated cardboard box. Use cloth bags or socks for storing individual items, such as camera bodies and lenses. Make sure the cloth is dry by setting it in direct sunlight for 30 minutes or so. Custom-built carrying cases are available for many still and movie cameras. The case will protect your camera from bumps, keep the lens clean and free from scratches, and keep light out of the exposure meter, thus preserving meter-battery life (if your meter uses batteries). Make sure the camera is stored away from heat or direct sunlight, and moist or humid areas. If you leave your camera in an automobile, put it where it will not lie in direct sunlight. A good spot is on the floor behind the front seat. Do not leave your equipment on the rear-window deck or on the dashboard, and do not put it in the glove compartment or car trunk since it may get hot enough to deform the camera or damage your film.
Some people think insecticides such as bug spray and moth crystals will protect their camera equipment while it is in storage. These can be as devastating to your camera and film as they are to insects. The chemicals in these insecticides can harm the camera lens and apparatus, and harden the emulsion of the film, even after the camera has been removed from storage. The chemical fumes can permeate the camera, and the residue that lingers after storage can continue to harm the film emulsion.
During long periods of storage, release the shutter a few times every few months. Sometimes the camera lubricant suffers and causes the shutter to operate improperly if it is not exercised